Gear Oil Coming From Solenoid:
3 Basic Causes:
1. Clogged axle breather vent:
The ARB Air Locker system naturally vents off slight amounts of pressure into the axle housing as the diff operates (hence the reason the compressor cycles normally every 4-10 minutes depending on O-ring condition). Additionally axles build up pressure as heat increases and the gear oil warms, hence the reason OE manufactures included axle breathers in their designs from the start. If the axle breather is clogged or blocked, it can create a high pressure situation (sounding like a weatherman?) inside the axle housing forcing gear oil fluid to penetrate the O-rings and into the air supply line. When the air line pressure is vented, this gear oil will be pushed up to the solenoid and out the release port. Once a slight amount of gear oil is in the line it can almost create a siphon effect, pulling more fluid from behind it. Check the axle breather for adequate passage, clean/replace as needed. Remove air line at the differential bulkhead fitting, purge line with compressed air and re-install.
2. Overfilled differential:
Check for proper gear oil level in the differential in compliance with manufacture differential specifications. Remove air line at the differential bulkhead fitting, purge line with compressed air and re-install.
3. O-ring failure:
Excessively worn or improperly installed O-rings on the Air Locker carrier can lead to gear oil penetrating the air system. When the air line pressure is vented, this gear oil will be pushed up to the solenoid and out the release port. Replace O-rings to correct problem.
Other Possible Scenarios:
Damage to the Air Locker Seal Housing - Replace as needed
Damage to the Air Locker cylinder cap (seal surface for the O-Rings) - Replace as needed
Damage to the adjuster nut, usually caused by improper installation resulting in a seal housing that can't seat flat against the nut - Replace as needed
Case Study:
Oil seepage from solenoid - We installed an ARB RD33/CKSA12 into the back of a 97' LX450 (80 Series Land Cruiser), the locker was bench tested and held pressure prior to installation. The customer wired his own compressor, thus the axle had never even been pressurized on the vehicle while the problem started occurring. We started with the easiest solution first, which was to make sure the axle had adequate breathers. We added a much larger breather setup, cleaned the air lines with compressed air and then pressure tested the system again. Everything functioned as planned.
Approximately 2 weeks later, the customer was having the same symptoms again, small amounts of gear lube leaking from the top of the solenoid (discharge vent) as it sat overnight, regardless of whether or not the locker was operated recently. At this point we decided to go ahead and pull the 3rd member and inspect the o-rings and seal housing for any obvious problems. Upon disassembly the only thing we could see was looked to be a small "manufacturing" mark on the cylinder cap of the Air Locker... however it was minor enough that we felt comfortable reinstalling the locker with new O-rings. The locker was bench tested using 110 psi (far more than the operational pressure of the locker), it tested above and beyond ARB's specifications. We reinstalled the 3rd member, buttoned everything up and cleaned out the air lines, once again using compressed air. The locker functioned as planned, we probably cycled it a hundred time over the course of a day, each time it worked flawlessly. Problem solved?
Another month goes by and I get a call from the customer, I had actually called him the day before just to double check that everything was holding up as planned... bad news, the solenoid was "drizzling" lube once again, enough to notice and cause lube to be "sprayed" after disengaging the locker. I place a call to the tech gurus at ARB, hoping they could think of something that we had missed. We covered the diff breathers, o-rings, etc... the only thing he could thing of is that we didn't get the lube completely cleaned out of the locker assembly. His analogy was "oil on a table", you can blow it with air all you want, but its just going to coat the entire table. He recommended using some brake cleaner to clean all of the residual air out of the lines. This seems plausible, we had no way of knowing how much lube was inside the piston assembly of the air locker, not to mention all the residual lube inside the plastic line that didn't get removed by the compressed air method (using the compressor).
Our next step is to clear the lines one more time... this time using some brake cleaner and higher pressure to really clear everything out. However if the amount of fluid leaking stays consistent between now and the time we get the customers truck in our hand... this is likely not the issue. If that is determined, we will once again pull the 3rd member, this time paying VERY close attention to the minor "scars" we noted on the cylinder cap, I have another cap ready to go if that turns out to be the case. Stay tuned, if you have any suggestions/ideas let me know!!
To date this is the ONLY locker I have dealt with that has experienced issues as such, we have literally sold and installed hundreds of lockers over the past 10+ years, and while we have had some isolated issues with o-rings, nothing like this case. While o-rings have failed in the past, I am convinced this unit has some issue besides the o-rings. All things considered I'm still 100% sold on the Air Lockers!
UPDATE:
We went ahead and pulled the 3rd again, the amount of fluid coming from the solenoid was enough to prevent the locker from functioning. We replaced the cylinder cap, u-ring/bonded seal, and used the newly introduced "square" cross-section o-rings. Rechecked the system using our pressure tester, re-installed the differential, and again rechecked the pressure. The lines were purged and cleaned and reinstalled on the differential. Fast forward several months and it is dry as a bone!!!
TROUBLESHOOTING
Air Line Supply Disruptions:
3 Basic Air Supply Disruptions:
1. Compressor fails to switch on
- a. Electrical fault (most common, usually a fuse, wiring, relay)
- b. Mechanical fault in compressor (rare)
- c. Isolating switch fitted and not turned on (as in a aux. fuse block switch)
2. Compressor fails to switch off
- a. Electrical fault (pressure switch)
- b. Air leak (compressor trying to meet pressure switch required)
3. Lockers fail to engage when button is pressed on
- a. Electrical fault (see part 1)
- b. Seized or leaking solenoid valve (easy to swap, relatively cheap)
- c. Mechanical fault in compressor (rare as mentioned before)
- d. Inadequate air line pressure.
Common Solutions:
1.a & 3.a:
- Check the battery terminal is connected
- Check all connections are secure, no loose or disconnected wires
- Check the fuse (system only requires one 30 amp fuse)
- Check pressure switch relay & dash mounted switches
(a simple multi meter/test light can be used for all testing)
1.b:
- If mechanical fault is suspected in compressor (return to ARB service center)\
1.c:
- Test all functions of isolating block with multi meter/test light
2.a:
- Check that pressure switch is functioning using multi meter/test light
2.b:
- Air leakage can occur at several locations in the air supply system for a number of reasons.
2.b.1 - Check all connections
2.b.2 - If leak is detected at fittings, remove, clean, apply sealant, and tighten.
3.b:
- Solenoid valves (Part# 180102 & 180103) can be disassembled and cleaned.
- Assemble onto compressor using hydraulic sealant (Loctite 569)
- If solenoid continues to fail, replace with new (or tested used) solenoid unit
3.c:
- If mechanical fault in Air Locker is suspected, remove differential and inspect
3.d:
- Using a pressure gauge on the line in question, measure the air line pressure. Pressure readings should match ARB specifications of
ARB Compressor Fault Diagnosis Procedure:
COMING SOON! (email if needed)
Install Notes:
Time and time again you hear somebody comment against the ARB Air Locker based on their experiences their 'buddy' had with one or some similar scenario. There is no mistaking that the ARB Air Locker does take special effort during the install however its of our opinion that these special install techniques don't detract from the units reliability or longevity, rather they just need to be done right for years of trouble free performance with your Air Locker. Cruiser Outfitters has been selling and installing ARB Air Lockers for over 15 years, literally hundreds of installs in various Toyota applications. We don't offer non-Toyota installs, we've become intimately familiar with all aspects of the Toyota application installs and we've chosen to limit ourselves there. Be sure your chosen installers has the knowledge to properly install an ARB Air Locker system, including correctly routing and tapping the differential housing for the air supply line, installing the bulkhead fitting kit properly and bench testing the unit to pressure before installing it back in the axle or sending it out for customer install. We bench test all of our built differentials at 100 psi for a minimum of on hour, under several different conditions. If any leak down is noted we address the o-rings or related air supply components before you get the differential in your axle, at which point its too late for a quick fix.
Install Errors:
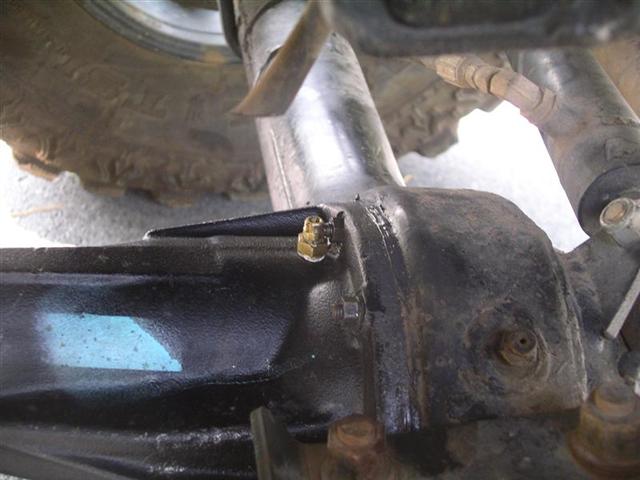
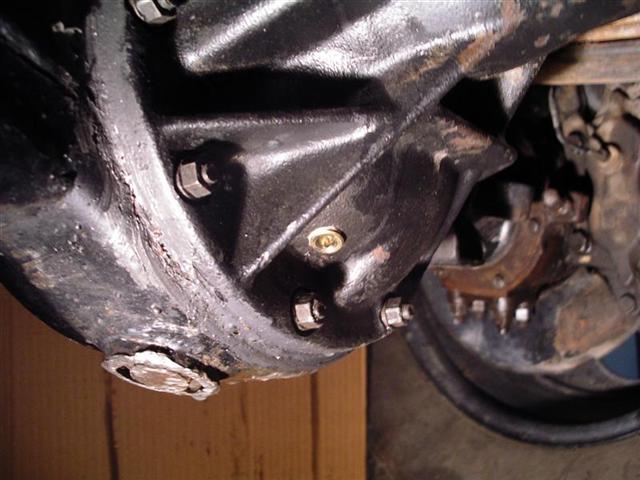
Some of the install pictures that have been sent our way or we've had come into the shop over the years. Again we can't stress enough that while the ARB Air Lockers are not any more difficult to install than any standard carrier, there are a few special considerations that the installer needs to be familiar with such as where to drill and tap for the air supply line, this includes knowing which side of the axle housing to drill it on.

While it might be easier to route the line to the bottom of the differential on the inside of the housing, please do not! It goes without saying that this isn't going to end well for this locker setup.

Another case of install error. In this case the drill and tap location for the bulkhead fitting apparently wasn't given much attention or thought ahead of time. This customer ended up having to completely disassemble the axle to relocate the air supply setup.

Yet another case of install error. In this case the installer likely assumed this housing was a standard rotation low pinion where in fact it is a high pinion reverse rotation 80 Series front. At least in this case the problem was caught before the differential made it back into the vehicle and the installer was able to plug their mistake
Links:The Truth About Air Lockers - From the February, 2009 issue of 4Wheel & Off-Road
Information contributed by:
Cruiser Outfitters
ARB Air Locker Service Manual
September 2003
*See something missing, wrong, or incomplete? Please let us know!
Disclaimer: Cruiser Outfitters, cruiseroutfitters.com, its owners, contributors, employees and agents will not be held liable for damages and or injury under any circumstances for information presented accordingly. Furthermore, said agents reserve the right to modify/remove/edit all information accordingly.


